

9 Easy White Pumpkin Painting Ideas For Halloween
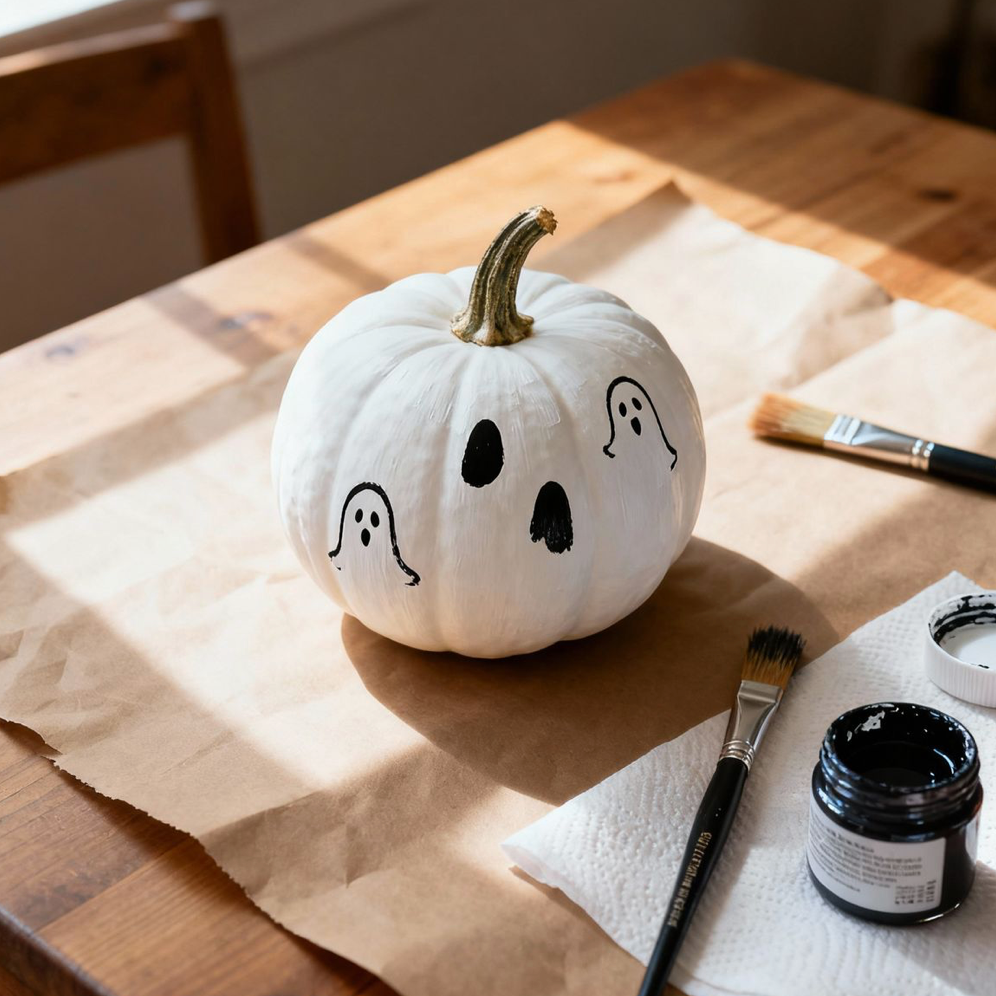
Source
White pumpkins are the perfect canvas for creative Halloween decorations. Their neutral color makes painted designs stand out, whether you prefer cute Halloween characters, spooky details, or elegant seasonal decorations. Best of all, you do not need to be an artist to create a beautiful pumpkin. With a few acrylic paints, fine brushes, and a little imagination, you can transform an ordinary white pumpkin into a unique Halloween centerpiece. These 9 easy white pumpkin painting ideas include everything from a cute cow and a delicate spiderweb to spooky haunted houses, playful bats, and adorable ghosts!
What You Need to Paint White Pumpkins
Before choosing your favorite design, gather a few basic supplies. You can paint real white pumpkins or artificial white pumpkins, depending on whether you want decorations that last beyond Halloween.
Essential supplies:
White pumpkins, either real or faux
Acrylic paint in black, pink, orange, green, and other colors you love
Small paintbrushes for details and larger brushes for filling in shapes
A pencil for sketching your designs
A fine-tip paint marker for outlines and small details
A paint palette or disposable plate
Paper towels and a cup of water for cleaning brushes
A clear protective sealer, especially for artificial pumpkins you plan to reuse
Helpful tips for beginners:
Clean and dry your pumpkin before painting.
Sketch complicated designs lightly in pencil before adding paint.
Apply two thin coats instead of one thick coat for smoother coverage.
Allow each color to dry before painting overlapping details.
Use acrylic paint for decorative pumpkins, and keep painted pumpkins away from food preparation surfaces.
If you paint a real pumpkin, inspect it regularly for soft spots and rot. Painted real pumpkins will not last indefinitely.
Now, explore these 9 easy white pumpkin painting ideas for Halloween.
1. Cute Cow White Pumpkin
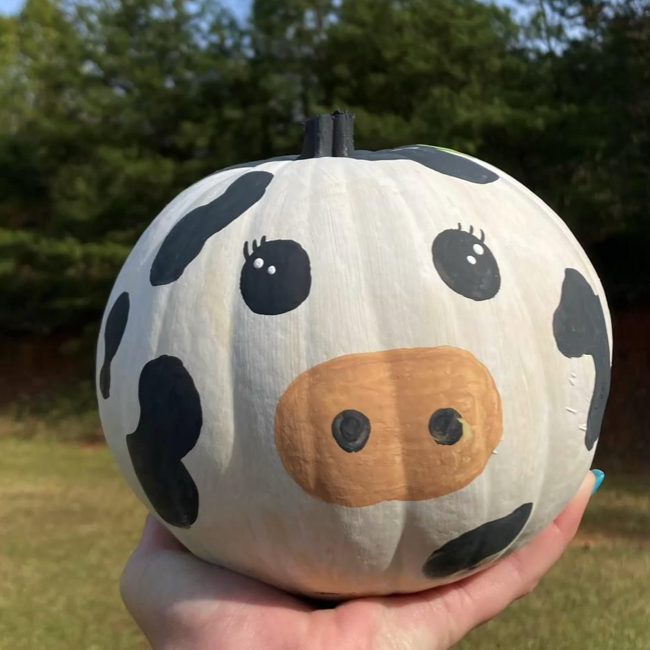
A cute cow pumpkin is an adorable choice if you love playful Halloween decorations rather than traditionally spooky designs. The combination of black patches, a pink nose, and little ears looks especially charming against a white pumpkin.
This design works well in a farmhouse-inspired home, on a kitchen counter, or as part of a Halloween display with other animal-themed decorations.
What you need:
Black acrylic paint
Pink acrylic paint
A small detail brush
A pencil
How to create a cute cow pumpkin:
Start with a clean white pumpkin.
Lightly sketch several irregular black patches around the pumpkin.
Fill in the patches with black acrylic paint, leaving plenty of white space between them.
Paint a pink oval on the front for the cow's nose.
Add two small black nostrils and a simple curved mouth.
Paint or attach small ears near the top, if desired.
Finish with tiny black eyes for an extra-cute expression.
Styling tip: Pair your cute cow pumpkin with mini white pumpkins, black-and-white gingham ribbon, and a rustic wooden tray. You can also create a small collection of painted farm animals for a playful Halloween centerpiece.
For an even simpler version, skip the ears and focus on the signature black patches and pink nose. The design will still be instantly recognizable.
2. Spiderweb White Pumpkin
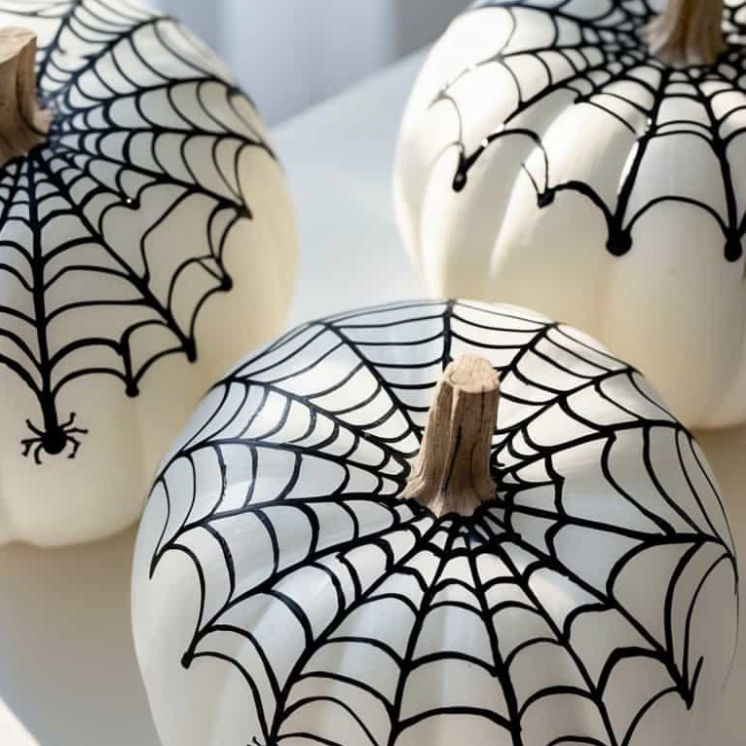
A spiderweb pumpkin is a classic Halloween decoration that looks striking without requiring many supplies. The contrast between white and black creates a clean, graphic design that suits both modern and traditional Halloween displays.
You can paint a single spiderweb across the front or cover the entire pumpkin with delicate web patterns.
What you need:
Black acrylic paint or a black paint marker
A fine-tip brush
A pencil
Optional: small plastic spiders for decoration
How to paint a spiderweb pumpkin:
Choose the front of your white pumpkin.
Draw several thin lines radiating outward from one central point.
Connect the lines with slightly curved horizontal lines to create the web.
Use a fine brush or paint marker to trace the design in black.
Add a tiny black spider hanging from one of the lines.
Let the paint dry completely before displaying the pumpkin.
Styling tip: Place your spiderweb pumpkin beside black candlesticks, faux cobwebs, and miniature pumpkins. For a more sophisticated look, keep the web delicate and avoid adding too many extra decorations.
If you prefer a glamorous Halloween aesthetic, use metallic silver paint instead of black. The silver web will shimmer against the white surface, creating an elegant seasonal accent.
3. Haunted House White Pumpkin
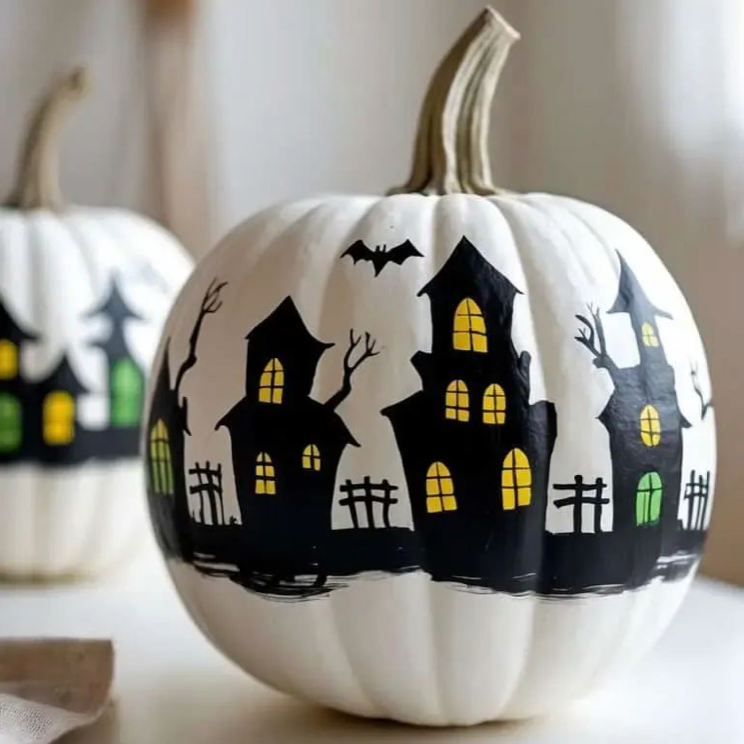
A haunted house pumpkin brings a spooky Halloween scene to life. You can paint a simple silhouette of a crooked house, complete with pointed rooftops, dark windows, and a crescent moon. This design looks impressive but can be surprisingly easy to create.
The curved surface of a pumpkin also makes the scene feel more dimensional, especially when you paint the house across the front.
What you need:
Black acrylic paint
Yellow or orange paint
A small detail brush
A pencil
Optional: purple or dark gray paint
How to create a haunted house pumpkin:
Sketch the outline of a crooked house on the front of the pumpkin.
Add a pointed roof, a chimney, and a few uneven windows.
Paint the house silhouette black.
Add yellow or orange windows to make the house appear illuminated.
Paint a crescent moon in the sky above the roof.
Add tiny flying bats or a few bare tree branches around the house.
Let the design dry before adding any final details.
Styling tip: Arrange several white pumpkins together and give each one a different spooky scene. A haunted house pumpkin looks particularly effective next to black pumpkins, faux spiderwebs, and warm LED candles.
For beginners, simplify the house into a basic silhouette with three windows and a crooked roof. You do not need intricate architectural details to create a recognizable haunted house.
4. Bat White Pumpkin
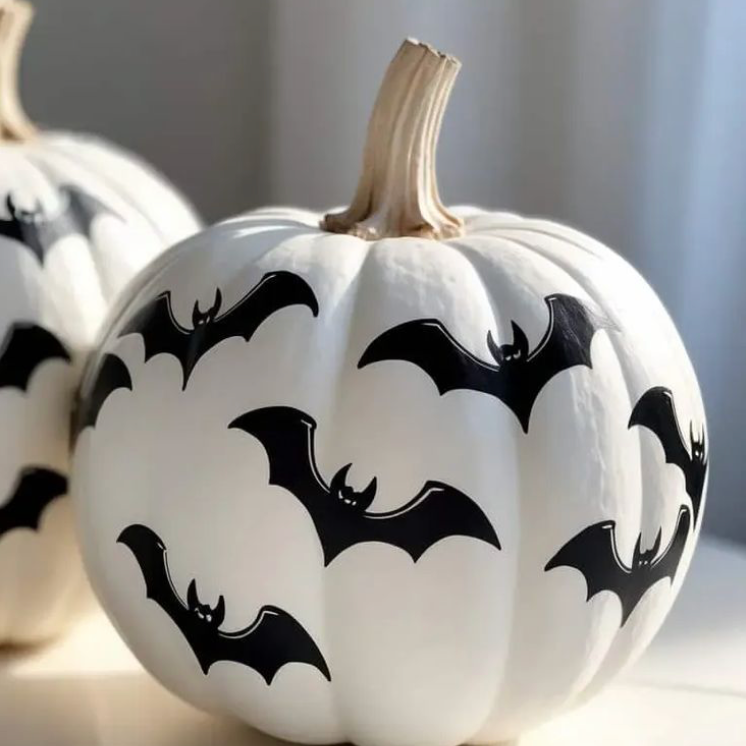
Bats are an easy way to give a white pumpkin a classic Halloween look. Their simple silhouettes are beginner-friendly, and you can arrange them in almost any pattern.
Paint a single oversized bat for a bold design, or create a group of tiny bats that appear to fly across the pumpkin.
What you need:
Black acrylic paint
A fine-tip brush
A pencil
Optional: white paint for small facial details
How to paint bats on a white pumpkin:
Sketch a few bat silhouettes in different sizes.
Give each bat a small central body and pointed wings.
Fill the shapes with black paint.
Add tiny white eyes if you want a cute rather than spooky appearance.
Let the paint dry before handling the pumpkin.
Styling tip: Paint bats that gradually increase in size as they move across the pumpkin to create a sense of movement. You can also combine the bats with a crescent moon or a small spiderweb.
For an extra-simple design, use a bat-shaped stencil. This helps you create crisp silhouettes without needing to draw each shape freehand.
5. Black Cat White Pumpkin
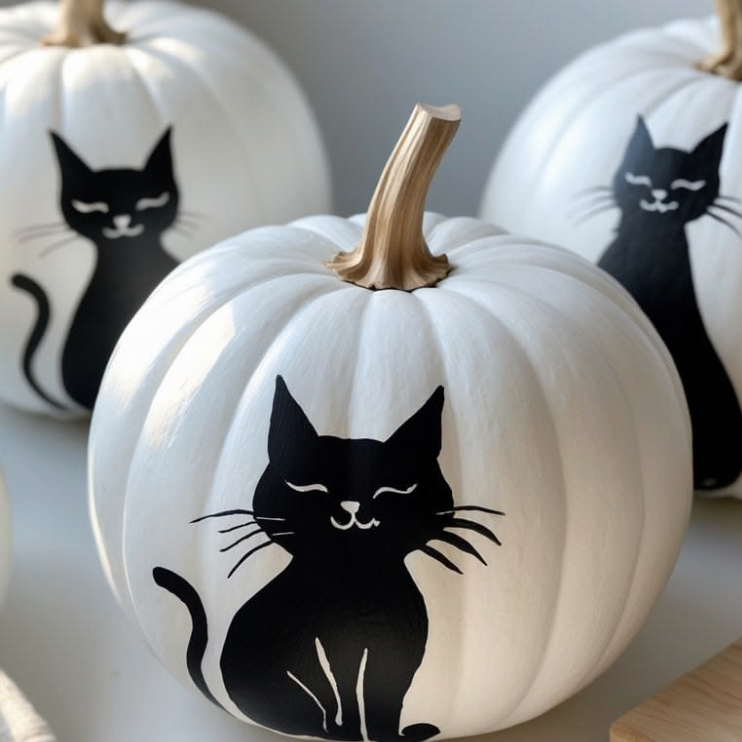
A black cat pumpkin is perfect for anyone who loves cats, witchy Halloween decorations, or cute seasonal crafts. Against a white background, the cat's dark silhouette stands out beautifully.
You can paint just a cat's face, create a sitting cat silhouette, or design a pumpkin that resembles a little black cat with pointed ears.
What you need:
Black acrylic paint
Pink paint
White paint
A fine-tip brush
A pencil
How to create a black cat pumpkin:
Sketch two pointed ears near the top of the pumpkin.
Draw the outline of a cat's head beneath the ears.
Fill the head with black paint.
Add two white or yellow eyes.
Paint a small pink or black nose.
Add thin whiskers using a fine brush.
For a more detailed design, include a curved tail along one side of the pumpkin.
Styling tip: Display your cat pumpkin beside a witch hat, black ribbon, and a few mini pumpkins. A collection of white pumpkins featuring different cat expressions also makes a fun Halloween centerpiece.
If you prefer a minimalist look, paint only two black cat eyes, a small nose, and whiskers directly onto the white pumpkin. This simple design is quick to complete and still captures the Halloween spirit.
6. Skull White Pumpkin
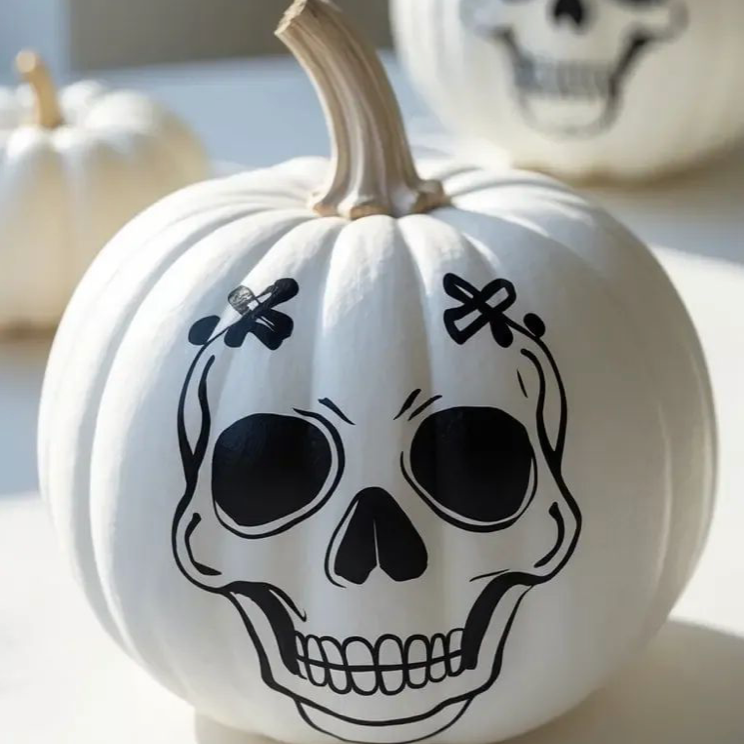
A skull pumpkin is an excellent option if you want something a little more dramatic. It combines the clean appearance of a white pumpkin with dark facial details for a spooky, slightly gothic decoration.
You can create a traditional skull, a cartoon-style skull, or a decorative sugar-skull-inspired design with colorful accents.
What you need:
Black acrylic paint
Gray paint
A fine-tip brush
A pencil
Optional: pink, purple, blue, or gold paint
How to paint a skull pumpkin:
Lightly sketch a rounded skull shape on the front.
Draw two large eye sockets and a small triangular nose.
Add a simple mouth with short vertical lines representing teeth.
Fill the eye sockets and nose with black paint.
Use gray paint to add subtle shading around the cheeks and jaw.
Allow the design to dry.
Add small decorative details if you want a more artistic finish.
Styling tip: Keep the skull monochromatic for a minimalist Halloween look. Alternatively, add tiny flowers, colorful dots, or gold accents around the eyes for a decorative sugar-skull-inspired pumpkin.
You do not need to paint a complete skull across the entire pumpkin. A simple skull face with dark eye sockets and a toothy smile is enough to make the design recognizable.
7. Floral White Pumpkin
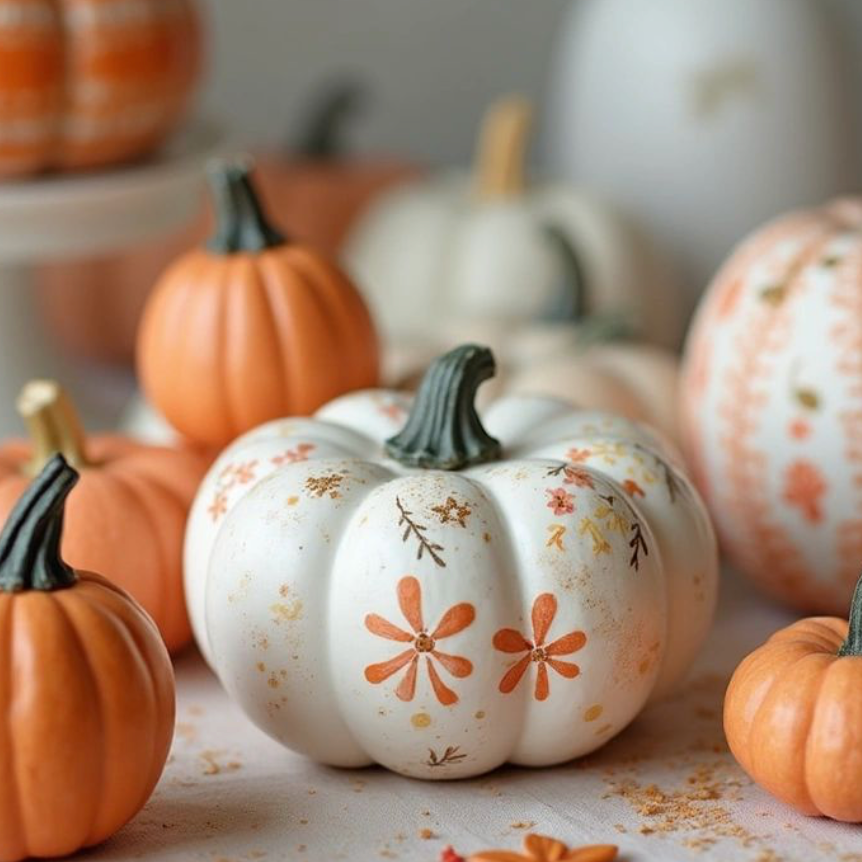
Not every Halloween pumpkin needs to look frightening. A floral white pumpkin offers a softer, more elegant take on seasonal decorating. Flowers in black, burgundy, dusty pink, or muted orange create a beautiful contrast against a white background.
This idea works especially well if you enjoy cottagecore, romantic interiors, or understated autumn decorations.
What you need:
Acrylic paint in your chosen flower colors
Green paint for stems and leaves
Small round brushes
A fine-tip brush
A pencil
How to paint flowers on a white pumpkin:
Decide where you want your flowers to sit. You can create a floral wreath around the center or paint a cluster on one side.
Use small brushstrokes to form the petals of each flower.
Add a contrasting color to the center of each bloom.
Paint thin stems and a few leaves around the flowers.
Repeat the design with different flower sizes to create a natural arrangement.
Add tiny dots or delicate vines to fill empty spaces.
Styling tip: Use muted colors for a sophisticated autumn display, or choose black flowers for a more traditional Halloween look. Pair the pumpkin with dried flowers, neutral linens, and warm candlelight.
For beginners, try painting simple daisies. Make five to eight small petal shapes around a central dot, then add a few green leaves. This approach creates a pretty result without requiring advanced painting skills.
8. Hedgehog White Pumpkin
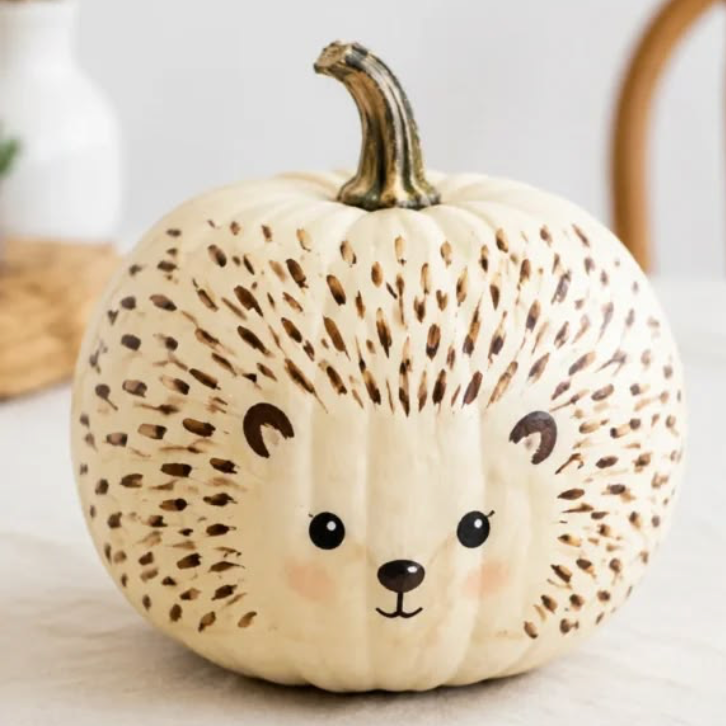
A hedgehog pumpkin is a sweet and unexpected Halloween decoration. Its little face and spiky silhouette make it particularly suitable for animal lovers, children's craft sessions, and anyone who prefers cute Halloween designs.
The white pumpkin provides a bright background for the hedgehog's brown spines and small face.
What you need:
Brown or dark gray acrylic paint
Beige or light brown paint
Black paint
A small detail brush
A pencil
How to create a hedgehog pumpkin:
Sketch a small rounded face on the front of the pumpkin.
Paint the face area beige or light brown.
Add a rounded black nose and two tiny black eyes.
Paint small brown or gray strokes around the upper and side areas of the face to represent spines.
Vary the length and direction of the strokes to create a textured appearance.
Add a tiny smile if you want an extra-cute expression.
Let the paint dry before displaying the pumpkin.
Styling tip: Surround your hedgehog pumpkin with miniature pumpkins, faux autumn leaves, and small pinecones. This creates a woodland-inspired Halloween arrangement that works throughout the fall season.
If painting individual spines feels too complicated, use short dashes in several shades of brown. The variation in color and direction will suggest the hedgehog's spiky coat without requiring precise detail.
9. Ghost White Pumpkin
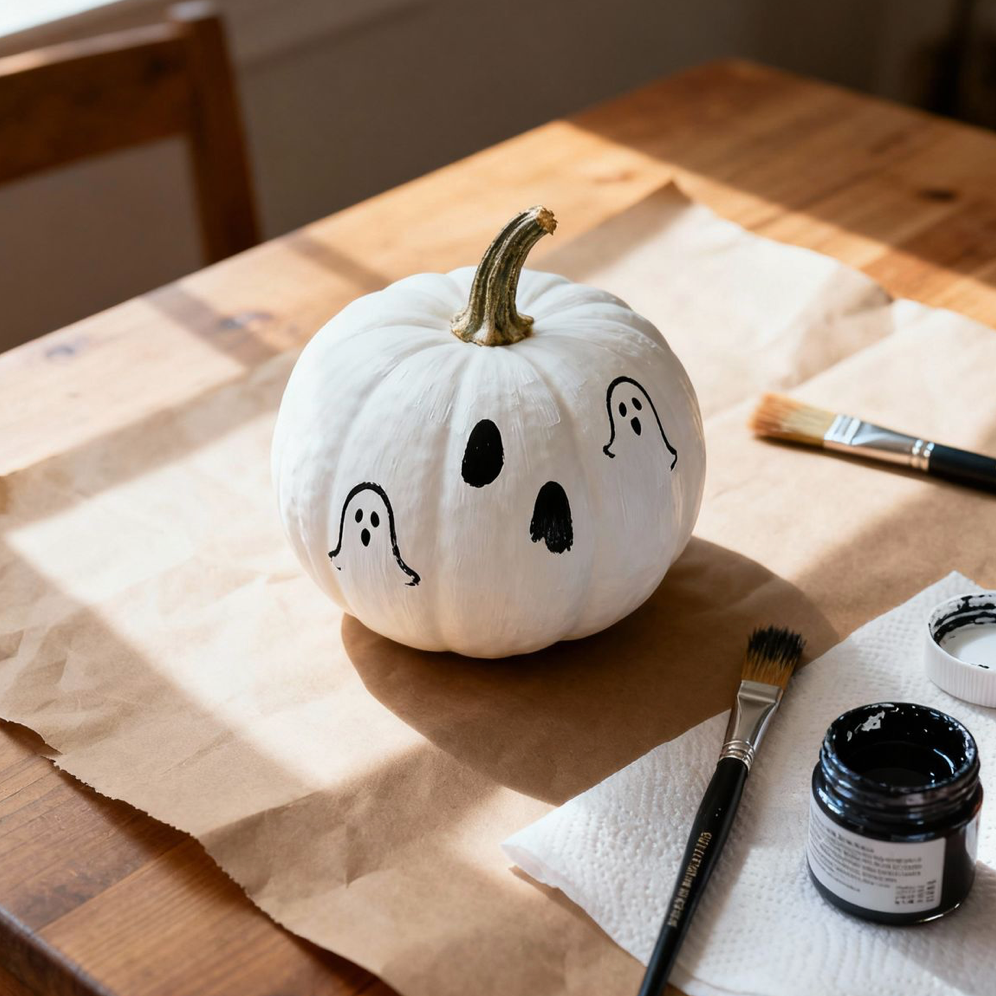
A ghost pumpkin is one of the easiest Halloween pumpkin painting ideas because the white surface already matches the character. All you need is a few simple facial details to turn an ordinary pumpkin into a friendly little ghost.
This design is ideal for beginners, quick Halloween crafts, and family decorating sessions.
What you need:
Black acrylic paint
A small detail brush
Optional: pink paint for rosy cheeks
How to paint a ghost pumpkin:
Choose the smoothest side of the pumpkin for the face.
Paint two small black oval eyes.
Add a tiny round or oval mouth.
Paint small pink circles on either side of the face for rosy cheeks.
If desired, paint a few tiny stars around the ghost.
Allow the paint to dry completely.
Styling tip: Create a group of ghost pumpkins with different expressions. Give one a surprised face, another a happy smile, and another sleepy eyes. Display them together on a mantel, shelf, or front porch.
For a more dramatic version, use black paint to create a larger ghost silhouette against the white pumpkin. However, the simplest design is often the most charming: two eyes and a little mouth are all you need.
Tips for Making Your White Pumpkin Paintings Last
Once you have chosen your favorite design, a few simple steps can help preserve your painted pumpkins.
Start with a clean surface: Remove dirt and moisture before painting.
Choose the right pumpkin: Faux pumpkins are a practical option if you want decorations you can reuse every year.
Use thin paint layers: Thin coats help details dry evenly and reduce smudging.
Allow adequate drying time: Follow the paint manufacturer's instructions before adding another layer or moving the pumpkin.
Protect artificial pumpkins: Once the paint has fully dried, use a compatible clear sealer if you want extra protection.
Keep real pumpkins cool and dry: Avoid leaving them in direct sunlight or damp conditions for extended periods.
Handle painted designs carefully: Even dry acrylic paint can chip if the pumpkin is dropped or rubbed against rough surfaces.
Remember that real pumpkins are perishable, and painting them does not prevent natural decay. If you want to keep your Halloween decorations for several seasons, faux pumpkins are usually the more durable choice.
Frequently Asked Questions About White Pumpkin Painting Ideas
What paint is best for white pumpkins?
Acrylic paint is a popular choice for painting white pumpkins because it comes in many colors, dries relatively quickly, and works well for both large shapes and small details. Acrylic paint is particularly useful for faux pumpkins and decorative real pumpkins.
Always check the paint manufacturer's instructions for the intended surface, and allow the paint to dry fully before handling the pumpkin.
Do you need to paint a white pumpkin before decorating it?
No. A naturally white pumpkin or a white artificial pumpkin already provides a suitable base for many Halloween designs. You can paint black bats, spiderwebs, ghost faces, or floral patterns directly onto the surface.
If the pumpkin has a patchy color or you want a brighter white background, apply a suitable base coat and let it dry before adding your design.
What are the easiest white pumpkin painting ideas for beginners?
The easiest designs use simple shapes and minimal colors. Great options include:
A ghost with two eyes and a small mouth
Black bats in different sizes
A spiderweb drawn with a paint marker
A minimalist black cat face
A cute cow with black patches and a pink nose
These designs do not require advanced painting skills and can be adapted to suit your preferred Halloween style.
Can you use markers to decorate white pumpkins?
Yes. Acrylic paint markers can be useful for drawing spiderwebs, bats, stars, faces, and other fine details. They are particularly convenient when you want clean lines without using a small paintbrush.
Choose markers designed for the pumpkin's surface, and test them on a small, inconspicuous area first.
How do you keep painted pumpkins from chipping?
Use suitable paint, apply thin coats, and allow each layer to dry completely. For faux pumpkins, a compatible clear protective sealer can provide additional durability.
Avoid rubbing or dropping painted pumpkins, and remember that real pumpkins will eventually deteriorate regardless of the paint used.
Are white pumpkin painting ideas suitable for kids?
Yes. Simple designs such as ghosts, bats, flowers, and cute animal faces can be enjoyable crafts for children. Choose age-appropriate, non-toxic art supplies and provide adult supervision when needed.
Artificial pumpkins are especially convenient for craft sessions because they can be reused and do not decay like real pumpkins.
Can you paint white pumpkins without drawing skills?
Absolutely. Start with simple shapes such as dots, lines, circles, and silhouettes. You can also use stencils to create consistent designs.
The ghost, bat, and spiderweb ideas are particularly beginner-friendly because they rely on straightforward shapes rather than realistic illustrations.
Should you use real or faux white pumpkins?
Choose real pumpkins if you enjoy natural autumn decorations and do not mind replacing them as they deteriorate. Choose faux pumpkins if you want to reuse your designs, experiment with different paint colors, or keep your Halloween decorations for several years.
Both options work well for most of these painting ideas.
White pumpkin painting is an easy way to personalize your Halloween decorations without investing in complicated supplies or advanced crafting techniques. From a cute cow and a classic spiderweb to haunted houses, bats, cats, skulls, flowers, hedgehogs, and ghosts, there is a design for every decorating style.
Did you like this article? Then you may also like to read about: